AK-47 and Clones Break down and Cleaning Instructions
Hello all, RON L herewith yet another I hope interesting and helpful tutorial on Breakdown and Cleaning of the Vaulted AK-47!
I prefer to do this on a Nice large lay out area, I have chosen the Top on the Dryer and a Piece of Plywood, in the field, I prefer a Poncho or liner layed out, so as I clean and lube the parts, I can set them down clean and ready to re-assemble!
Yes, EVEN THE AK NEEDS CLEANING! The only way to do that is to take the Monster down to some simple large parts, Unlike the AR, no small pieces to lose, no small parts to bend or destroy! These disassembly instructions were performed on my Maddi AKM clone but the majority of the instructions will cross over to any make or Model AK Semi or Full automatic. (Soldiers in the field take note, this is a great way to disable captured AK Styles of weapons by the removal for key components and destroying the receiver!)
PIC , AK-47 Egyptian Maddi Clone ready to disassemble, right out of the gun safe
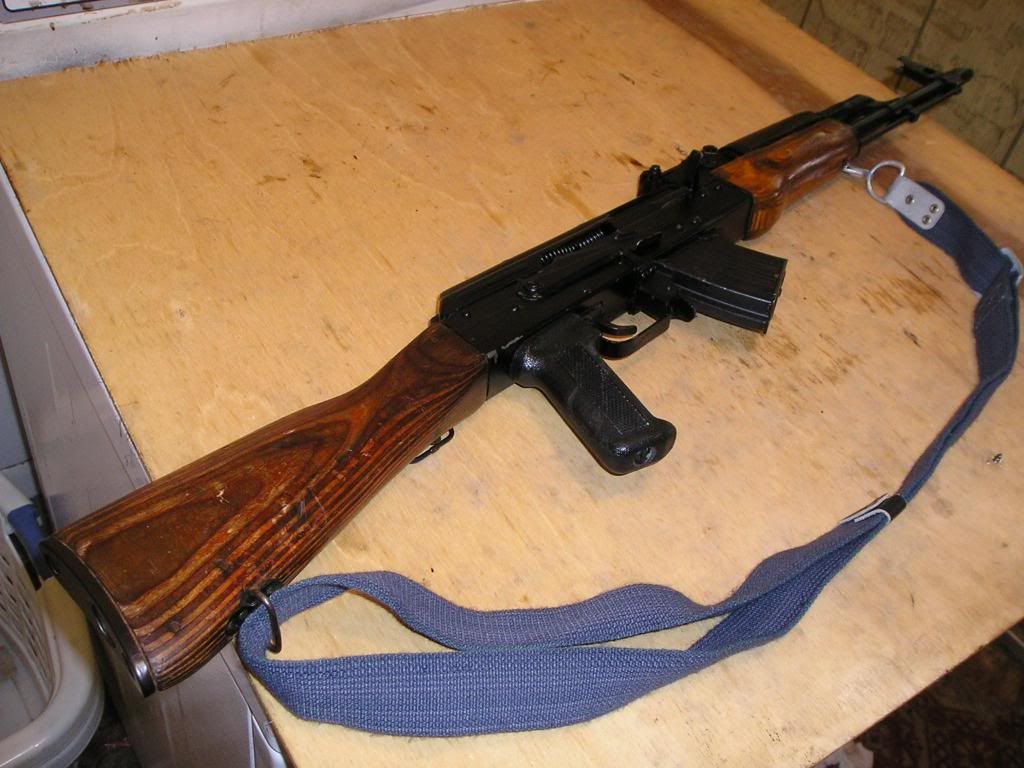
SAFETY FIRST, IN A SAFE AREA, Pull the magazine and Check the Chamber and Lay unloaded magazine to the side, we will show you how to clean that later as well, a clean magazine is the fix for many a malfunctioning Semi-auto rifle not just AK!
AK with the 5 Round Clinton Era magazine removed and set to the side so we can check the chamber and ensure the magazine was empty?
PIC #1
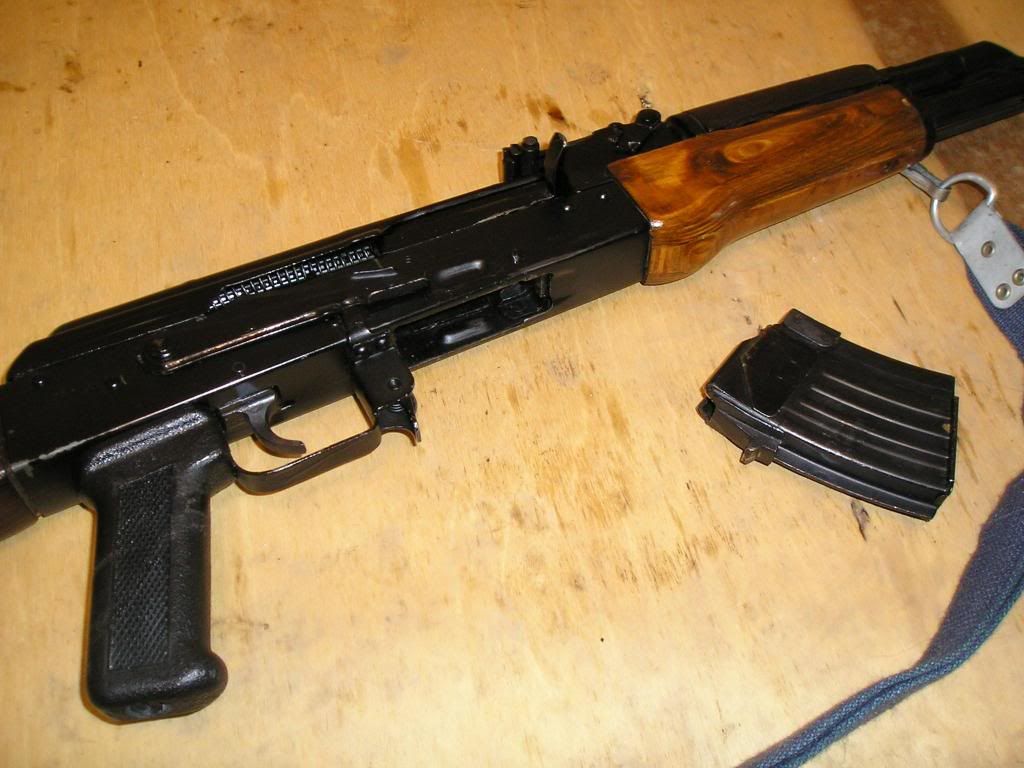
Now that we know the AK is unloaded and safe, we need to Depress the Button on the top back part of the receiver and remove the Spring Cover set cover aside. For those not used to AK, this is the Button at the rear most top of the back of the top of the weapon.
Pic # 2
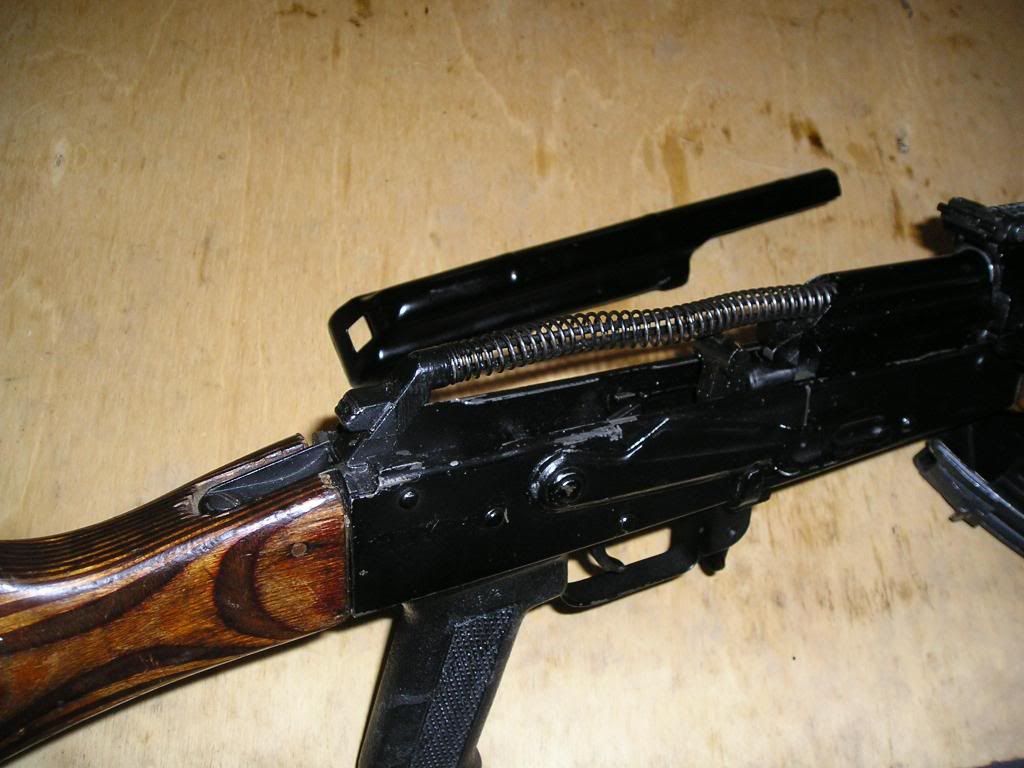
OK, now we have the Cover off, we can use a Rag soaked with solvent and simply wipe out the inside and out side of the cover, if especially dirty, a tooth or other Brush soaked in solvent can be used to scrub the cover inside and out, once clean, lightly oil (I SAID LIGHTLY, we are not floating a battle ship here!) Once complete set off to the side I prefer the left but any side that works for you?
PIC#2

We need now to Remove the Bolt spring and guide assembly! This is done by depressing the same button on top of the weapon we did to allow the cover to be remover, only this time, we have to Push it forward enough to allow it to Slide forward off the rails and once we have it captured allow the spring and =guide to move back and slide it out of the Bolt carrier assembly
PIC #3
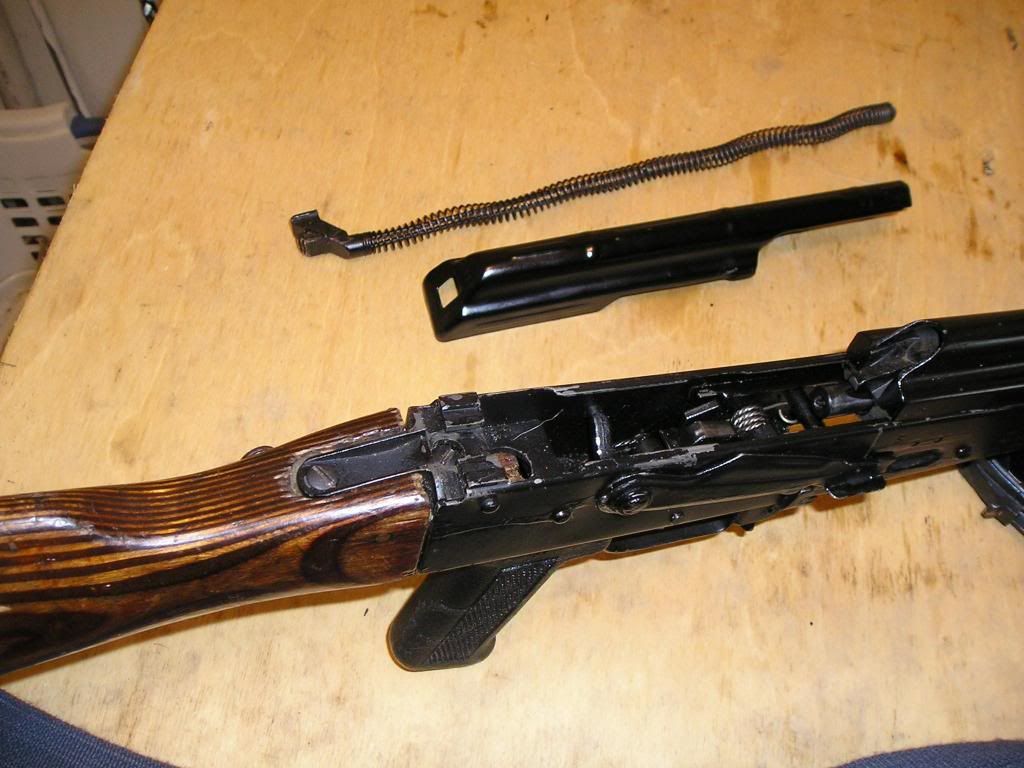
OK, this part gets nasty dirty and is often Ignored a lot! Use a tooth or paint Brush or if you have none with you a rag with heavy solvent on it and scrub and clean all the spring components no need to remove the spring from the guide it stays as 1 unit and can be cleaned and oiled slightly after that, once complete set off to the side wit the cover assembly, I like to set them in order so when I re-assemble, it's all there to do?
PIC # 3

HOW WE DOING SO FAR, EASY RIGHT?? If a 6 Year old boy in Viet nam can do this, SO CAN YOU! LOL Were coming to the more complicated part so listen up?
Right, now with the Bolt spring and Guide removed cleaned and Oiled, we can Pull the Bolt Charging handle, located on the right side of the Top of the rifle with out hand till the Bolt, and carrier assembly slide to the rear and out of the receiver, once done, set to the side, we need to talk about this now!
Pic# 4
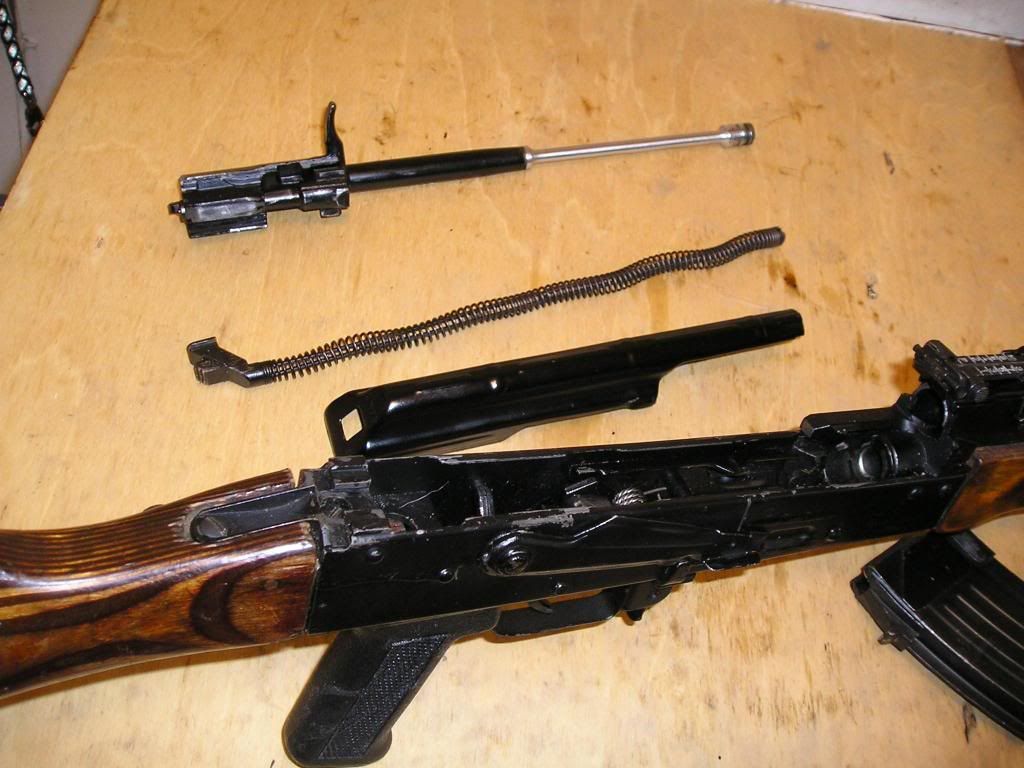
The assembly ya just remover is the 'HEART of the weapon and Proper cleaning of this will help it last 100 years! See the Gas Pistol sticking out of the Bolt carrier assembly usually it's a Pistol that chromed and allows gas and Burned power to deposit on that and make the action function, use a Rag soaked in solvent and if never has need cleaned in past a Tooth or paint Brush to clean all the Groves in the Pistol the Piston Body and face, (DO NOT OIL, REMOVE EXCESS SOLVENT AND LET DRY) Now, use a rag soaked in solvent and brushes to scrub the entire Bolt carrier Body, Now come the trick part, rotate the Bold assembly (that's the little part that wiggles around under the Bolt carrier assembly!
PIC # 5/8
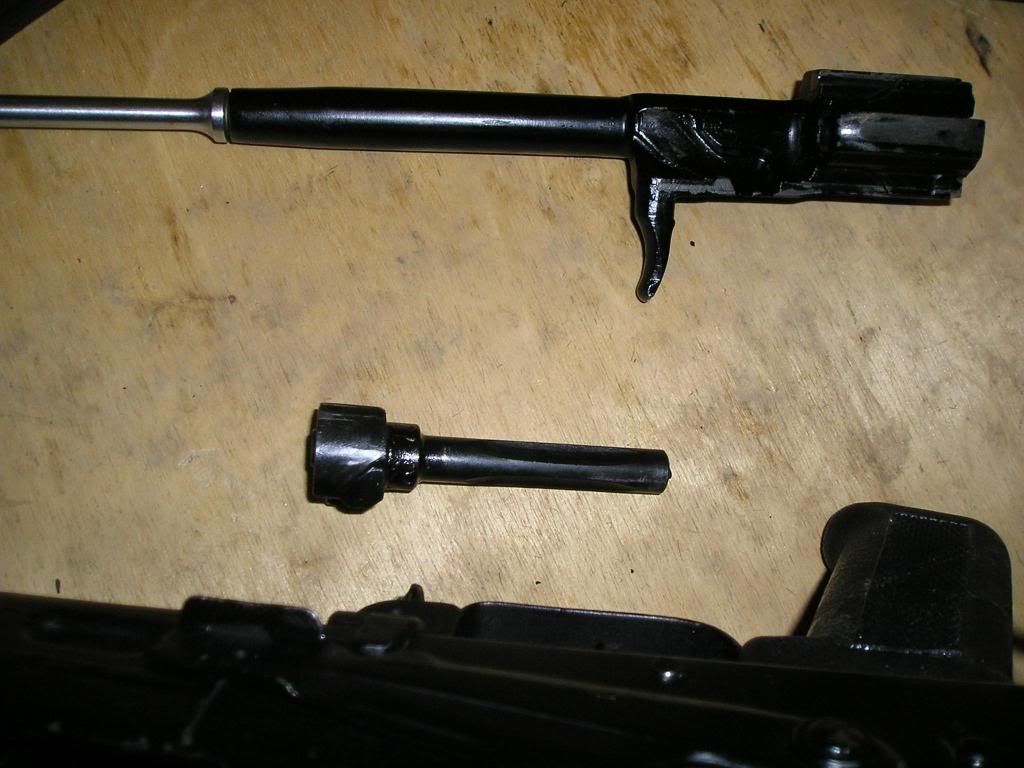
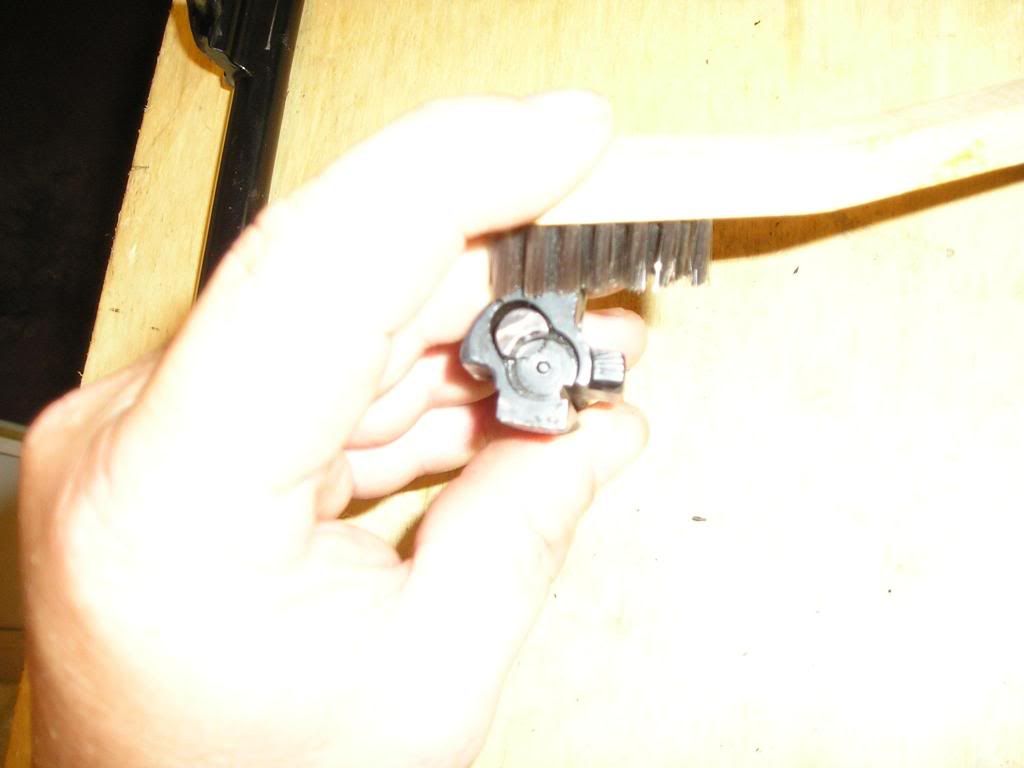
Now, rotate the Bolt assembly out of the carrier and scrub the Bolt Face and body with a brush and rag soaked in solvent! No need to remove any parts clean it as is 1 part and lightly oil the components, again DON'T SOAK IT IN TOO MUCH OIL attracts dirt and unburned powder and fouls things up! Once clean and lightly oiled set it aside next to the bolt carrier. You can rotate it back into the Bolt carrier body assembly or do that once we re-assemble?
PIC # 5/7/9

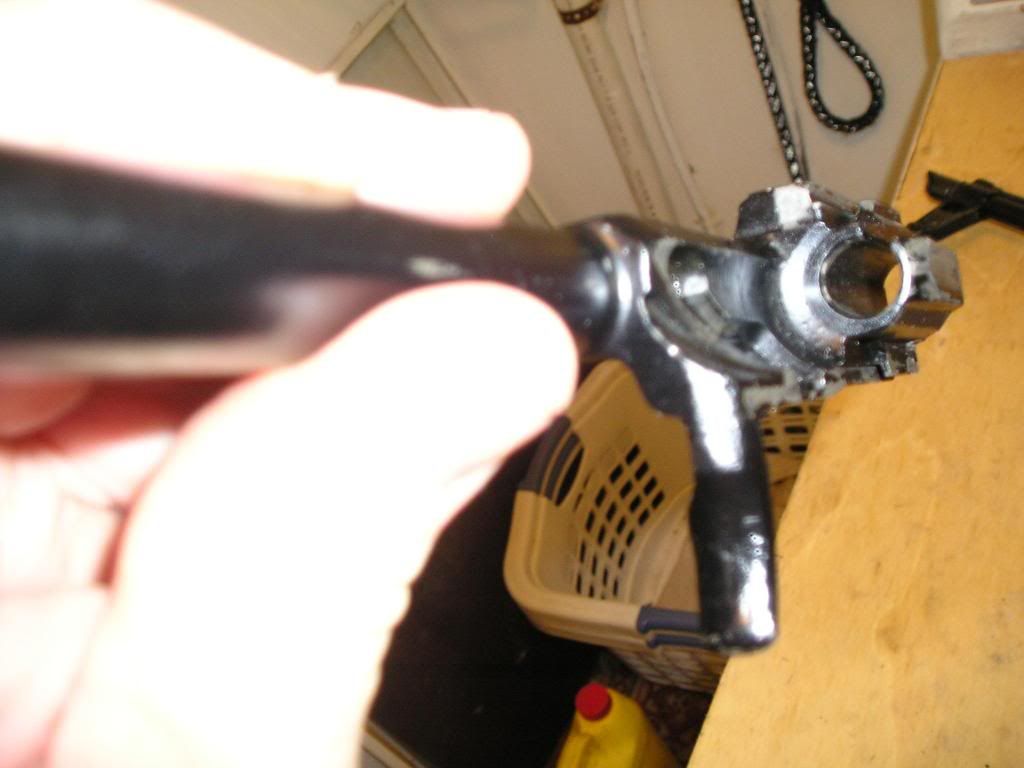

OK, now we have taken care of the really important parts but what about the barrel and chamber assembly? Lets do that now, but while we do so, lets not ignore where all the dirt and un burned power drops into the action and springs and mucks up the works? Shall we?
PIC# 6
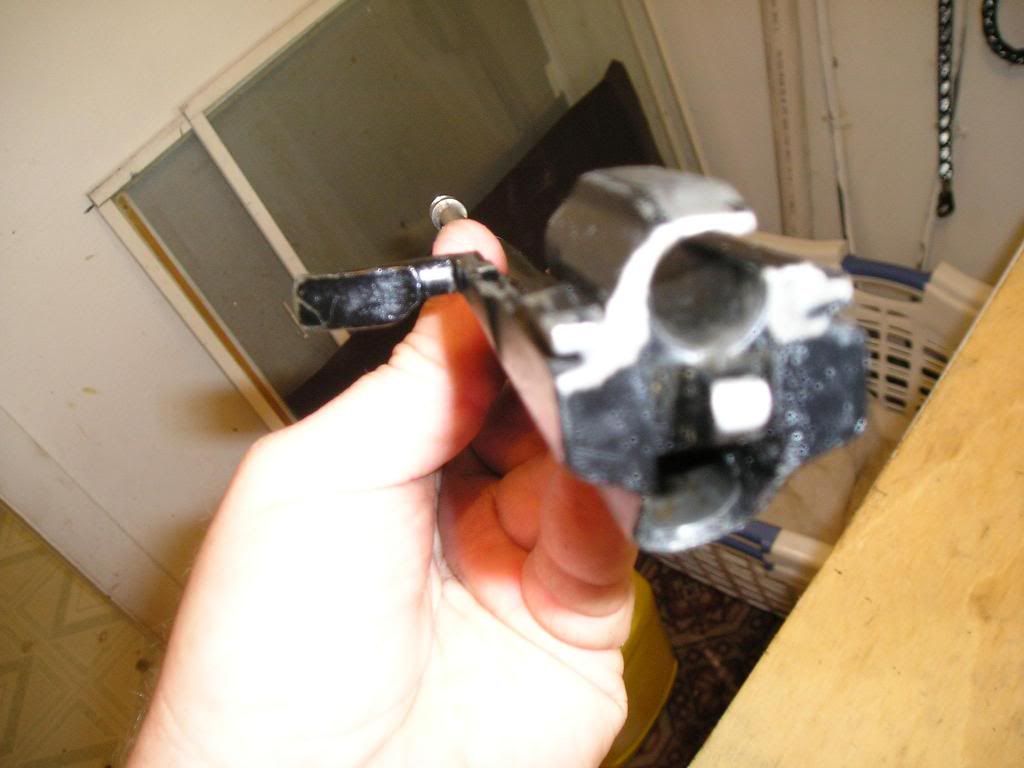
OK, I like to make this area as clean as I can, so I use a set of different size Brushes and all to scrub out the internal part of the receiver! Use a soft Brush and no harm or Miss-alignment of parts will happen and your able to scrub to your hearts content, if really fouled badly, use a can or Carb Cleaner and spray into the action, if you have plastic pistol grip pr furnature watch out, as carb cleaner or Brake cleaners likes to melt those? LOL Once that's clean, then use a 30 caliber Barrel Brush and patches to clean the barrel, go from the barrel side as your not able to go from the rear like an AR can! Watch the Muzzle rifling and if your AK has a Butt stock cleaning kit, you will find a Cap of the kit can allow slip over the Flash hider and allow the Barrel brush to be aligned correctly into the barrel and allow it to be cleaned and protect the all important muzzle rifling! Damage of that can cause Accuracy to plummet, yes even for an AK! So be CAREFULL!!!!
Pic #10
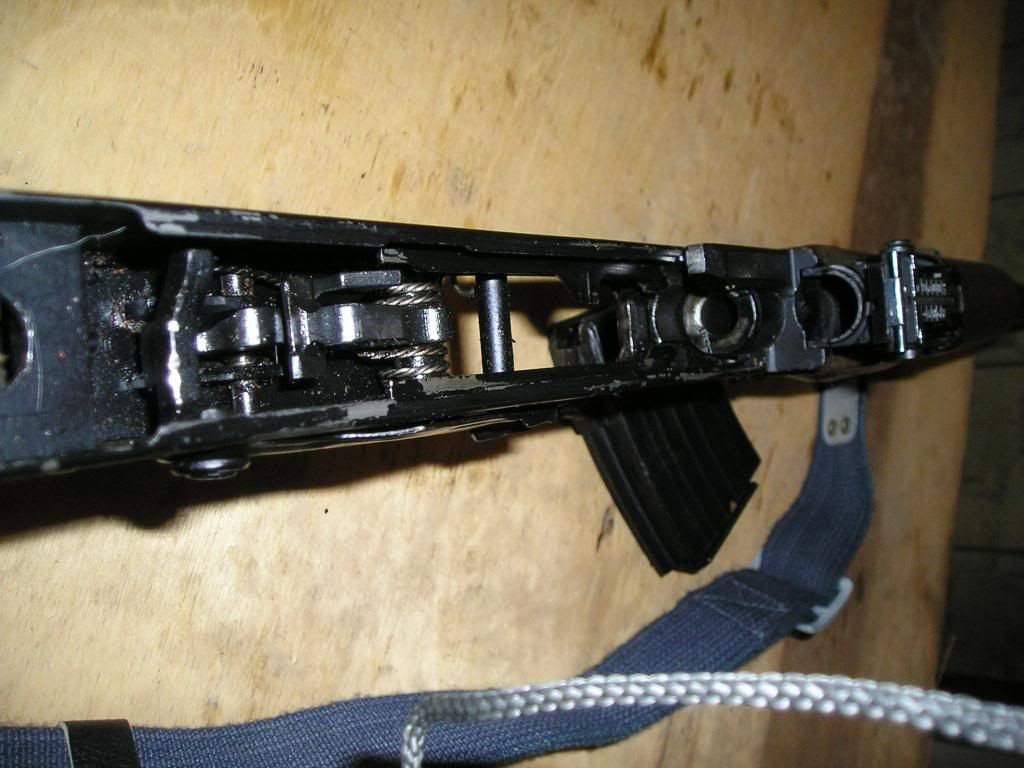
Now, all the parts have been scrubbed clean and dried off and in needed e places lightly oiled, now lets slap it back together? Some folks like the Gas Tube cover removed, but I simply use a Rag and cleaning patch and brushed to scrub that in place and no not oil! If you desire to remove it, once the weapon is dis-assembled, move the Lever on the top of the barrel assembly and pivot it up, that will allow the Gas Pistol cover to be lifted right off, this will not be possible with the bolt assembly in, as the gas pistol is then trapped in that assembly!
RE-ASSEMBLY!
Once the weapon is cleaned and oiled, lets put her back together, OK? If you have not re-assembled the bolt to the Bolt carrier assembly do so at this time, all ya need to do it slowly insert the stem of the Bolt into the carrier and then look how the parts rotate together and lock in place, the Bolt has to be all the way Forward to continue, OK? With that done, pick up the Bolt carrier assembly with the bolt hanging below it and keep it horizontal to the top of the receiver assembly slowly insert the gar Pistol assembly (keeping it all level so the bolt doesn't move on ya) Right, now look at the top and inside of the AK Receiver assembly, you will see Milled slots that the Bolt carrier has to ride on in the receiver, now allow the gar pistol to slowly move forward while allowing the slots in the receiver to allow the bolt to slide back in, GO SWOW and STEAD, Level headed assembly here is required, but it's not that hard, once the Gas pistol is slide forward and the Bolt assembly slides to the barrel and the Bolt carrier slides into the receiver Press Down Lightly to allow the hammer to be depressed inside the receiver to allow the Bolt assembly to pas and slide forward that part can be a bear so go slow and go steady! Once back in place the Bolt will go all the way forward.
Now, re-install the Bolt Carrier spring assembly and Guide into the Bolt carrier and Push till it's all the way in and Press Forward enough to allow the Notches in the receiver top to take the back of the Spring Guide assembly!
Great, almost done man and your doing fine! Now pick up the Bolt Spring Cover assembly and look a the top of the Receiver assembly were it will slide in and allow the Cover to Line up and slide into that Notch, go slow this part is a little trick, once in allow the Cover to Pivot down and depress the Bolt carrier Push Button slightly to allow the cover to seat down and lock in place! In most cases it will do so with a responding "CLICK"
If ya did it all correctly is will look like Pic #

Cool, it's all back together, but lets do an OP Check SHALL WE? Leave the magazine out, But Pull the BOLT handle to the rear a few times and ensure the bolt sides back and forth smoothly and easily, apply the safety on and off a few times and ensure that the safety Doesn't allow the trigger to depress when on safe but easily slides down with a "CLICK" then try and Dry cycle the trigger, make sure it still empty before ya do all that? If all that passes your Golden!!
Cleaning the magazine
The Most important part of your semi or full auto rifles feeding is the magazine, what use it is to clean the rife and have a dirty magazine inside? Kind of like dressing up in clean clothes but with no shower? YUKKK!
Pic# 11 30 Round AK magazine as it came with your weapon or ya got after:
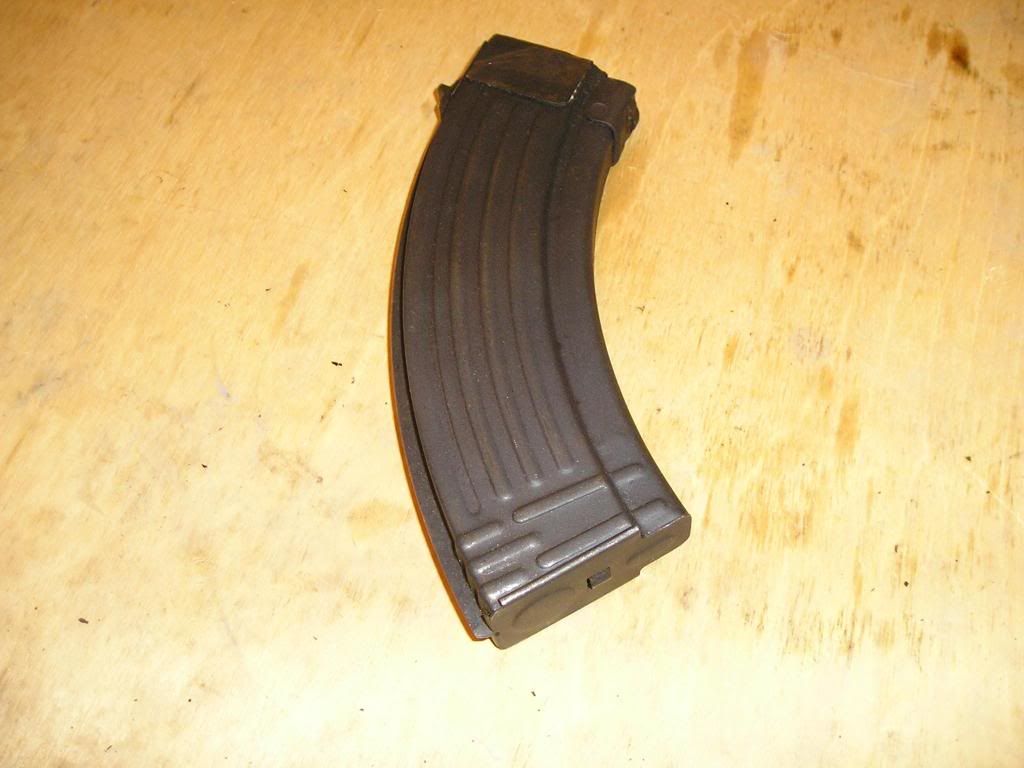
Now lets clean this bad boy? First invert the magazine so you can see the Bottom Plate
Pic #12
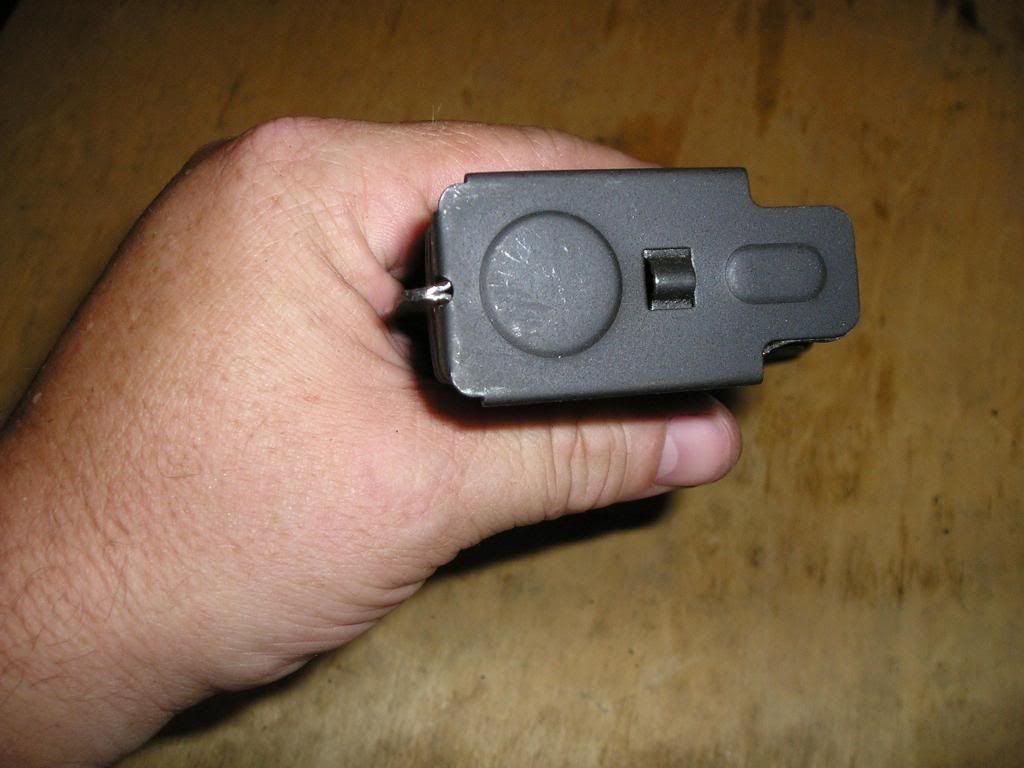
See a Button in the center of the Bottom Plate? That holds the Plate under magazine pressure and together, so, Lets Depress that and allow the Cover to Slide back, BE CAREFIULL, that's a STRONG SRRING and WILL Have to BE HELD UNDER CONTOL Or SPRING OUT LIKE A SNAKE?
Pic #13

OK, now we have slide off the Cover and held the spring from flying set the Bottom cover and Catch Plate to the side, But Only after we have scrubbed it with a rag with Solvent or a Brush with solvent. Set aside
Pic #14/15
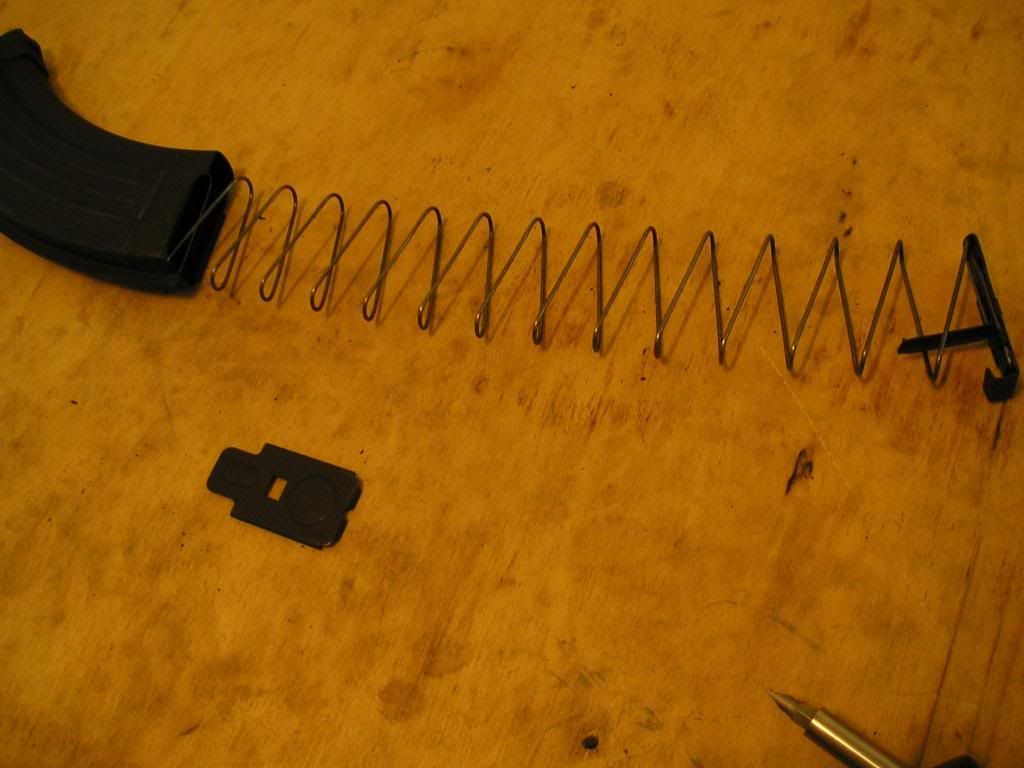
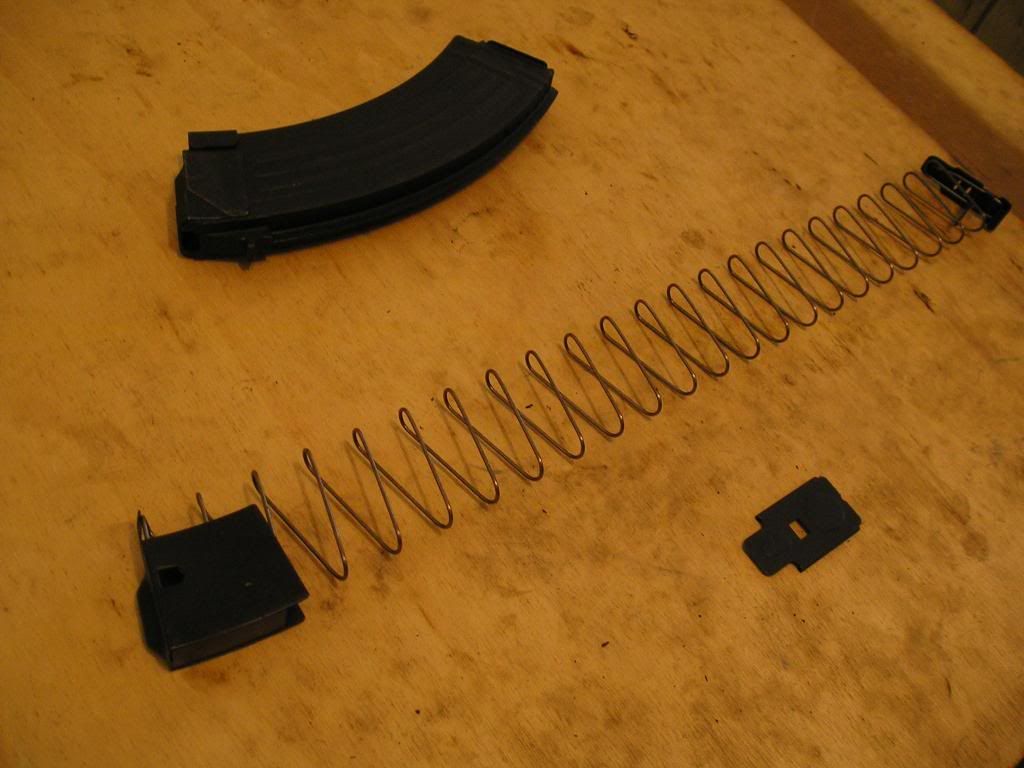
Push the top of the magazine follower that's the part the bullets sit on and pull the follower and spring out of the magazine body, as in wit the cover and catch Plates scrub clean with solvent and brushes. Once the Spring Coils and the entire follower is clean lightly oil and set aside.
Pic #16/17


Now the MOST IMPORTANT PART, 1 that MOST FOLKS IGNORE, Use a rag and Brushes soaked with solvent to scrub the inside and out side of the magazine body or shell? Once that's squeeky clean light oil it inside and out side No heave Grease and not a gallon of oil OK?
Once we have that slide the spring and follower back in following the groves inside the magazine body and shape of the follower and let to slide all the way up, De-press the Spring, slide the bottom cover and catch back in place as ya removed it and allow it to slide forward to lock in place! Once it's all back together push down the follower and see if it freely moves up and down, if smooth, then try and reload the magazine to 30 or what ever max of the magazine is! I lie the Dry cycle rounds out of the magazine or fire a mag out to check it, if dry cycle do this in a safe place where a discharge won't be a problem and simply pull the bolt handle to the rear and forward feeding and ejecting shells out of the magazine to test it in completion? If all that works, your set, Put the item away!
CONGRATS, YA DID IT, now that's wasn't so bad was it?? LOL OK parts of it were a Bitch, but a lot easier than an M-60/M-249? right?