Some Background I wrote about bringing water to the cabin back in July 2012 titled
Bringing Water to the BOL. If you haven’t had a chance to read the article please do so to understand the scope of this ongoing process. Since then we have been bringing our drinking and toilet water into the cabin one bucket at a time.
Typically we had three, 5 gallon Home Depot buckets in the bathroom for flushing. Plus five, 5 gallon blue jugs of water stored under the kitchen sink for use as needed for drinking and cooking. The water was pumped from each jug using a Whale marine foot pump. Our water usage was 1-2 toilet buckets and one drinking water jug a day. Obviously, more people at the cabin meant more water usage.
During the winter we just let the 900’ long poly pipe delivering our water from the well up the mountain to our outside faucet run free so the pipe wouldn’t freeze. The water rate at our outside faucet is ~ 5 gpm. This rate changes through-out the year depending on how full the well is.
This process of filling buckets and jugs had worked well since the winter of 2011-‘12 till last winter. In truth, lugging in buckets and jugs of water when it is snowing and -10F outside, was becoming a pain in my right hip. So it was time to add running water to the cabin.
Below is a list of what I wanted to accomplish:
> A water system that works in the winter with minimal time spent outdoors maintaining the system,
> The system has to be ran off our solar battery bank,
> I liked the PEX plumbing system. This system has been used in Canada since the mid- 1960’s and in the States
since the early 1990’s in homes. PEX was first was used in the States in the boating industry. Catalina sailboats were
the first. Now most USA made boats and RV's use it exclusively.
> Had to be able to drain/bleed easily if we left the cabin vacant during the winter, and
> Use a propane on demand water heater (Tankless water heater)that could be ran off a inverter for when the electric
went out, as it does often on the mountain.
Once I had that list complete I bounced it off to my brother. Then put together the below schematic. Last, I priced out the installation to see what we were getting into.
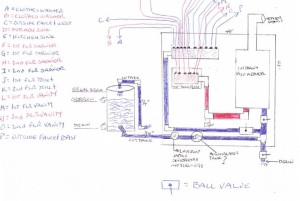
The estimated price was $2,500- which was not received well by “the wives” but heck – Who was carrying in all this
water after all.
Due to the lack of interest of the proposed water system by “the wives” the plan got spiked until this past fall. Bottom-line, as I mentioned earlier, I was tired of carrying 40 pound buckets/jugs of water into the cabin, while the snow was blowing horizontally and temps in the single digits; Consequently I threw caution to the wind and started the project in November (2015).
Part One: Bringing Water Into the CabinKnowing that part one would be the cheapest step and would probably be met with minimal negative noise I started there. I gathered my list and purchased the following *:
> 55 gallon plastic food quality drum,
> One 12 Volt marine grade water pump capable of 4-6 gpm and up to 60 psi,
> One 10 nipple ¾” PEX manifold with ball valves
> I had the 12/2 wire but I need some connectors and fuses,
> Assorted hose clamps, boiler valves, thru-hull fitting’s, wall clamps, screws, etcetera,
> Plywood (5/8’, 4x8’, cut to 4x5’),
> Concrete screws,
> 2x4’s,
> Sink faucet
> 8” freeze proof outdoor water faucet,
> 15’ of ¾” blue PEX pipe,
> 100’ of ½” blue PEX pipe, and
> Assorted PEX tools, fitting’s, clamps, etcetera.
Once I had collected my projects pieces I started to put them together not unlike a 1,000 piece puzzle of Hillary Clinton in an Orange Jump Suit.
Step OneBased on where the propane entered the cabin and the fixtures that will supply the water to kitchen and bathrooms reside I decided where to put the control panel for the cabin water system.
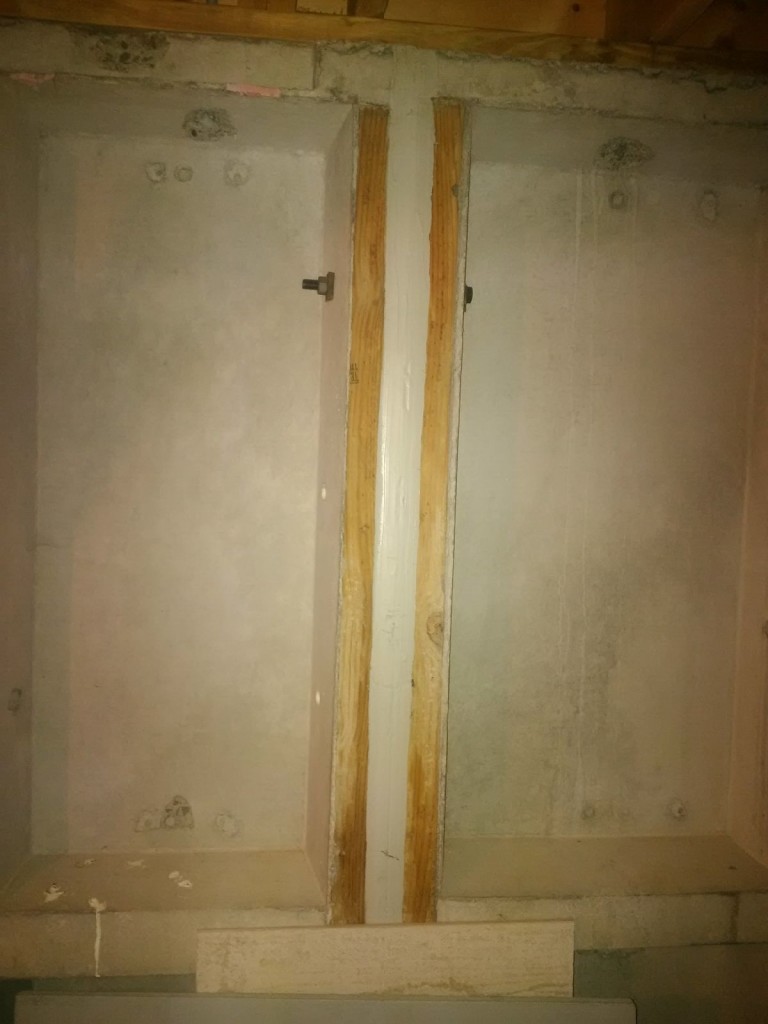
The perfect spot
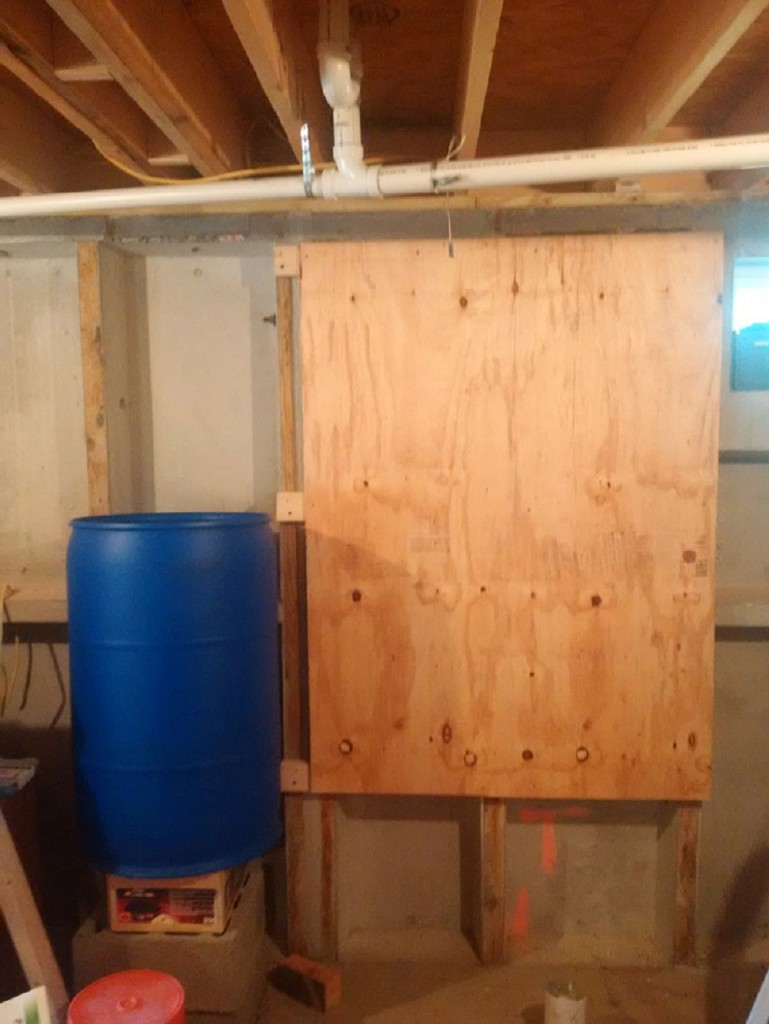
WSCP up and ready
With the right spot chosen for the water system control panel (WSCP), using cement anchor screws I put up three 2x4”’s that would support the WSCP and all what I will put on it.
Once that was completed I drilled out the 55 gallon water drum for the thru-hull fitting’s and boiler valves being attached to the fittings. One fitting was for water intake to the system (Bottom) and one was for an over flow valve (top).
Now it was time for the 12 Volt marine water pump. In order to help the pump function I elevated the water drum on two chimney blocks topped off with a square piece of plywood for stability.
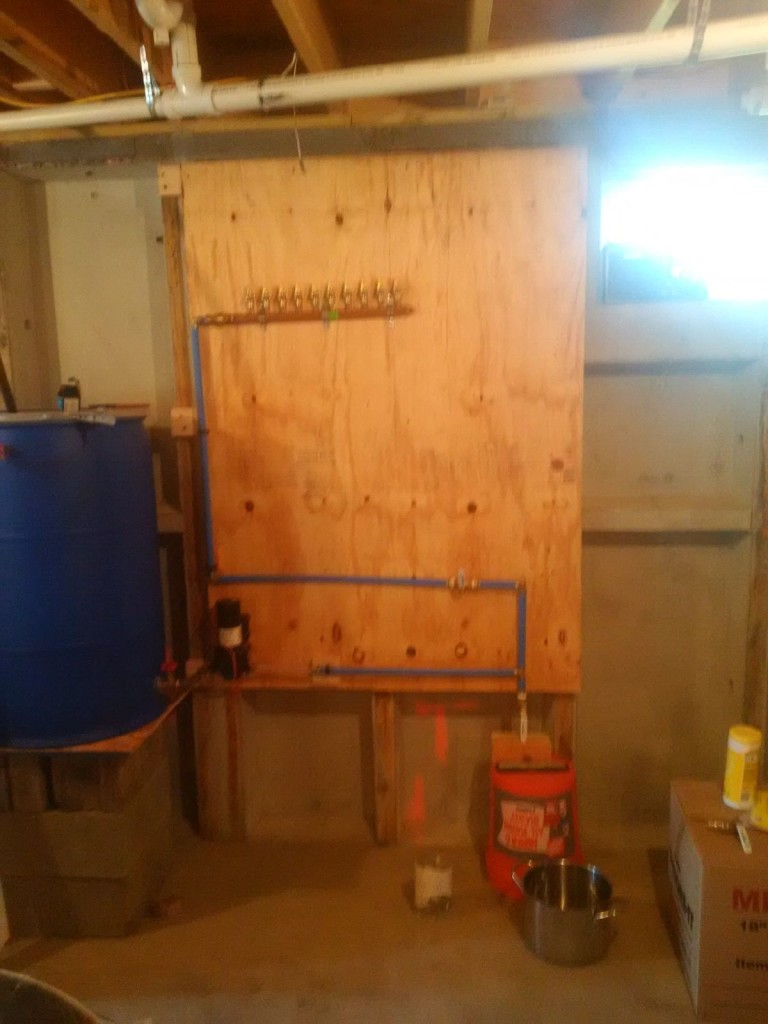
The rest of the cold water part of the system went together easier than installing a new fore grip on a AR. With that accomplished it was time to hook up the water pump to the 12 Volt control panel across the cellar.
Our solar power plant is located in our bunkhouse about 15 feet from the side of the cabin which I wrote about in an earlier article on
Solar at the Cabin. In short I dug a ditch, ran all of the power cables from the bunkhouse to the cabin through 2” Schedule 40 conduit back when we had no 120 volts going to the cabin in 2012. So the connecting between the pump and cellar based 12 volt box was easy albeit time consuming. The important thing though - The pump ran when I flipped the pump switch on. YEAH!
Next to the last step was to hook up the outside faucet that controls the water coming down from the mountain to the drum in the basement.
I decided to use ¾” irrigation poly pipe I had on hand. I fitted the intake end with a female water hose fitting. Ran the hose to the base of the cellar wall and affixed a Y valve to the end of the hose. I did this so when I was done filling the water barrel I could open the Y and allow the water to drain from the pipe in the winter. I close it when filling the barrel.
Then I drilled a 1 ¼” hole in the sill and inserted the 8” freeze proof outdoor water faucet. Hooked up the poly pipe down line from the aforementioned Y to the faucet Then another piece of poly pipe going into the barrel from the faucet pipe on the inside of the sill.
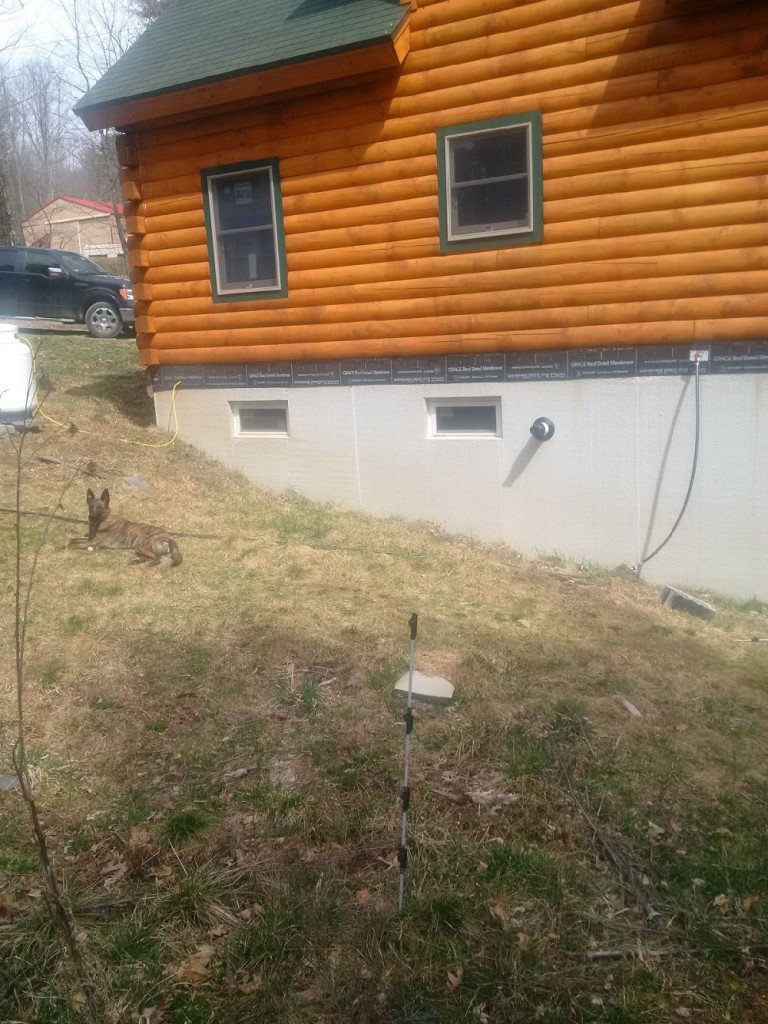
It always amazes me how long something takes that you think will just take minutes. This task believe it or not took all morning. The sill on the cabin is 6” thick as the cabin wall logs sit on the sub-floor which is supported with 4, 2x10” treated planks bolted together acting as the cabins sill.
Once the outside water source was hooked up I opened up the valve on the outside faucet and water came out one side of the Y valve. I then opened up the freeze proof outside faucet valve, closed the Y valve and started to fill the water barrel inside.
A quick note here: I pre-marked the water barrel into fifths. It takes ~ 3 minutes to fill each fifth or 15 minutes to fill the whole barrel.
The actual formula I use to fill the barrel is: Empty segments x 3.5 minutes – 1 minute = The time to set my timer when I fill the barrel. For you Sen. Sanders supporters here is an example. 4 segments empty x 3.5 minutes = 14 minutes – 1 minute = Fill time of 13 minutes. This 13 minutes allows me to do other chores like bring wood in for the wood stove, open a hard cider, take a leak…You get the idea. MrsMac has accused me of being an “A-Type” person and can't sit still for 5 minutes or so for 40 years now. The women is delusional.
The last item on this project was to run ½” PEX piping to the kitchen and 1st & 2nd floor toilets. Which was a snap with all of my previous experience of drilling and pulling wire.
Opened the barrel valve, turned on the pump switch at the 12 Volt control box; hollered up to MrsMac to open the kitchen faucet and then opened up the cold water manifold ball valve. Viola! I heard my wife scream we got water! Then I hollered up for her to flush the toilet and opened up the manifold ball valve and VOILA! No more lugging buckets inside for me anymore.
Once the water ran steady with no captured air I opened up the 2nd floor toilet. Checked for leaks at each junction. There was one and I tightened the connector with a pipe wrench and all was good.
The final cost for Part One came in at a total of $587-.
Part Two: Hot Water is Good TooI had kept the project from my brother and sister in-law. When he came up to the cabin for deer season he was blown away. So blown away he did the dishes most nights.
Before he left to go back home at the close of deer season, he handed me a blank check to pay for the processing of the deer he shot (At my ground stand I might add – Prick) for when I brought it down to him at Christmas plus a request to NOT go forward and install the hot water. He said, “I know you are ready to go installing the hot water but hold off for a bit - OK?” I just smile.
Now I ask my readers: How long is a bit? By February I figured I had waited long enough.
Looking at my schematic I started my second list of things to buy. It looked like this *:
> Propane Rinnai on demand water heater,
> Rinnai vent, Webstone Tankless water heater service valve kit,
> One 8 nipple manifold with ball valves,
> 100’ of red 1/2” PEX pipe
> GFI Electrical socket, and
> Assorted PEX fitting’s and clamps.
My plan was to do all of the plumping work myself however I was going to hire someone to do the propane hook-up. There is a lot of things I will do like, brain or appendix removal, rebuild a 8N tractor engine, manufacture a AR lower but propane is NOT one of them.
I contacted two different propane guys who gave me estimates. I checked around with the locals and they recommended only one of the guys I got estimates from so I went with him. We set up a date to do the work and I ordered the aforementioned items from local and internet vendors.
The contractor showed up a few days before the job was scheduled to see what I had gathered for the job. I guess he had been screwed before when owners claim to order what he needed. This to me was a good sign of who I hired for the job.
The morning of the job he showed up on time. Mapped out what he was going to do on the WSCP and jumped into the project. He first drilled a 6” hole through our poured cement cellar walls with the coolest drill and bit I have ever seen. Because of my interest he let me drill till my heart’s content. Once I was done he asked me if I had ever read “Tom Sawyer”. I broke out laughing thinking of old Tom talking someone into painting his fence for him.
Once the vent hole was drilled, the Rinnai was hung and pipe installed. Then he back filled in the vent gap with some foam installation.
Once that was done he hooked up the Tankless water heater service valve kit and PEX piping to the hot water manifold. He then made and then installed a four valve propane manifold. One of the valves was used for the water heater, one for the oven/stove and two will be used for future propane wall heaters to be installed at a later date in the bedrooms. Last he hooked up the propane manifold to a feed line to the existing propane bottle. While he did that, I installed the GFI socket and hooked up the electrical line to the main electrical box.
Once he had finished the propane install, and hooked up the new line to our propane bottle he tested the propane line for leaks. This took a half hour as he was VERY thorough. While he was doing the testing I ran hot water PEX pipe to the kitchen sink.
Six hours after the start to this project I hollered up to MrsMac to turn on the sink water to hot and we fired everything up. VIOLA! We had hot water. Thank you GOD!
Later that day, my brother arrived at the cabin for three days of R&R. I never said anything until it was time to wash the dishes. Once he realized I wasn’t heating water on the stove he freaked out. Freaked out positively (The pre-administered copious amounts of alcohol may have helped) and rushed over to do the dishes – Tom Sawyer comes to mind.
Once the dishes were done, we went down to the cellar to inspect the job.
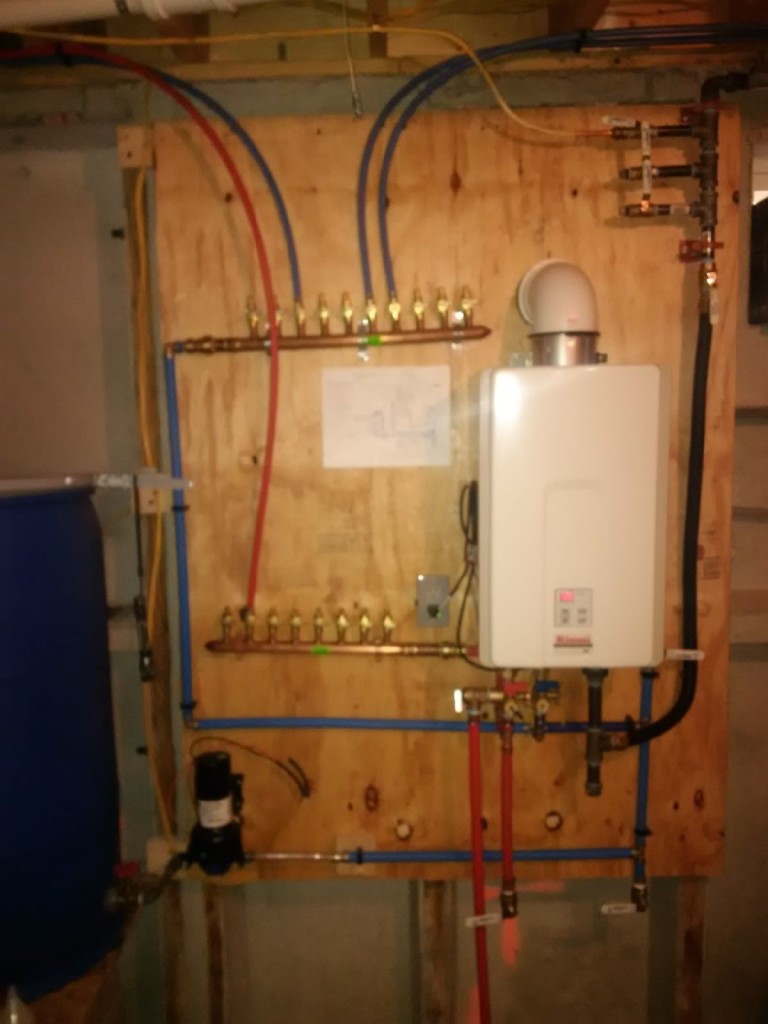
Last week I ran the hot & cold water PEX pipe to our walk in shower. Installed the new shower hardware and for the first
time at the cabin had a real shower. No more bucket, hose and kitchen sink sprinkler for us.
The last thing other than run PEX hose to the other appliances I have to install the inverter. I do have it, tried it and the Rinnai accepts the electrical sine wave the inverter puts out. We were a bit worried that it may not.
Before you say, “hey JohnyMac the manifolds are not level.” Ask yourself why that may be?
The final cost for Part Two came in at $1,862-. Total cost (Part 1 & part 2) with propane install labor, was $2,449-.
* Vendors and sites usedRinnai Tankless Water Heater Webstone Tankless Water Heater Service Valve KitPEX Manifolds and AccessoriesWater PumpAll other items from local construction vendors.